


原文地址:http://fursuit.tanidareal.com/daiqui...nt/04hhead.htm
作者:(德)TaniDaReal
狼狗英文水平不是很好,有翻譯失誤的地方請多多包涵hide=制作骨架]翻譯:
MAKING OF - THE HEAD
Credits and thank you to Nightfox, who helped me with the technical stuff.
鳴謝Nightfox提供的技術資料
制作骨架--------------------------------------------------------------------------------I used a different method for making the head this time (thank you to Tioh for the idea!).
這次我用了另一種材料來制作頭部(感謝Tioh的建議!)。
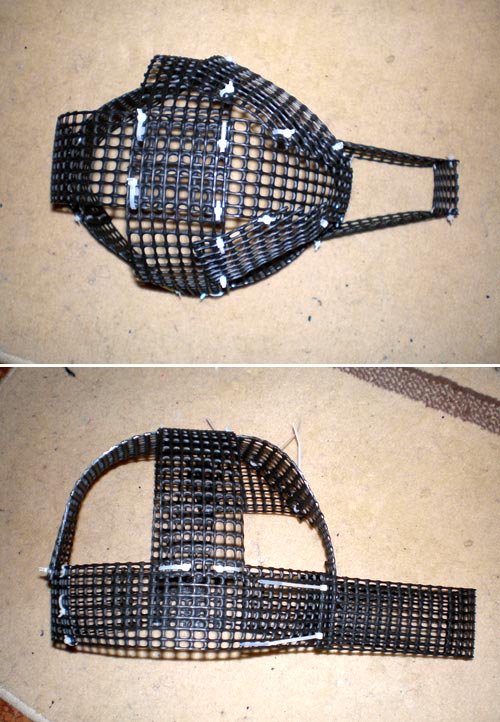
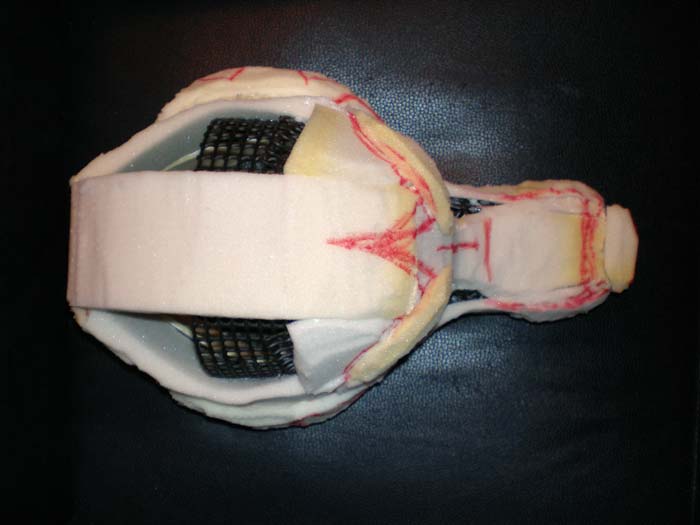
I made the basic form by using strong mesh from the home depot (German: "Laubgitter"), which is usually used to keep out leafs from the gutter. It's half round and about 2m long and 30cm wide (beware of sharp edges when cutting!).
我用來自家德寶(德語:Laubgitter)的牢固的鐵絲網制作的骨架,這種材料通常被用來阻止葉子落進水槽裏。它是卷起來的,大約兩米長、0.6米寬(切割時注意邊緣鋒利!)。
--------------------------------------------------------------------------------
I attached the single parts with cable ties (you can also use wire).
我用紮帶連接各部分(你也可以用鐵絲)。
This basic model is not too heavy but pretty stable, and it comes in useful for attaching stuff, like ears, fan, etc.
The more, it's easier to make the head look symmetrical as you can just count the holes (perforations).
這種骨架不算很重但相當牢固,並且在安裝眼睛、風扇等部件時也非常有用。另外,由於網格個數能夠被數清,它更容易被做得非常對稱。
添加泡棉和耳朵部分Then I started covering the "skeleton" with foam parts, or better stripes (using hot glue again). I did not close the head completely for a better air circulation.
然後我開始用泡棉包裹骨架,或更好的條紋(再次用到熱熔膠)。我沒有用泡面完全包裹以便有更好的空氣流通。
--------------------------------------------------------------------------------
The inside I coated with a thin, foam-like material, which is usually used underneath table cloth (it makes the table surface a little softer and stops moving the table cloth on the table, but it's also perfect for the inside of the head).
內部的附著物我用了一種薄的、像泡棉一樣的材料,這種材料通常被用在桌布下面(它使得桌面更柔軟,並且能防止桌布滑動;它也在獸頭內部有出色的應用)。
Again, everything's attached with hot glue.
再次說明,一切都是用熱熔膠來連接的。
--------------------------------------------------------------------------------
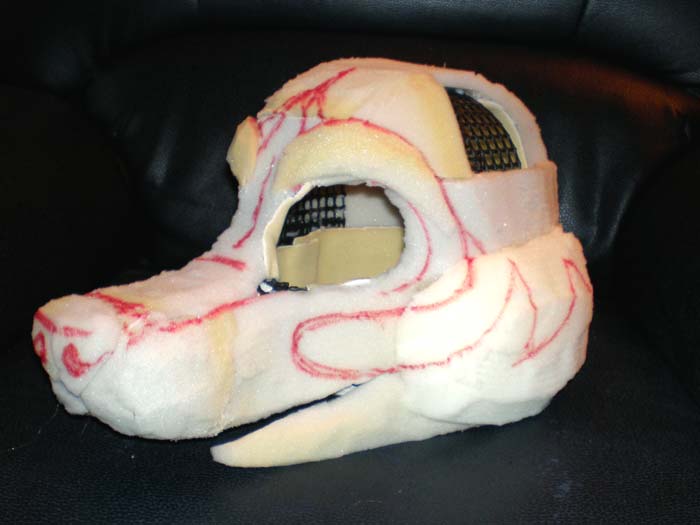
I added some foam eye brows for a nicer face form. The more, I tried to make the jaw really a part of the head (one piece, connected by foam), so that the jaw does not look that "attached" later like the chin of Frankenstein's Monster.
我添加了海綿眉毛以改善面部形狀。另外,我嘗試了讓下巴和整個頭部連爲一體(通過海綿連接),以免後來下巴像弗蘭肯斯坦的怪物的下巴一樣連在頭上。
Then I already drew the lines of the pattern on the head (with a board marker / Edding).
然後我已經用白板筆/記號筆畫好了頭部各部分的線條。
--------------------------------------------------------------------------------
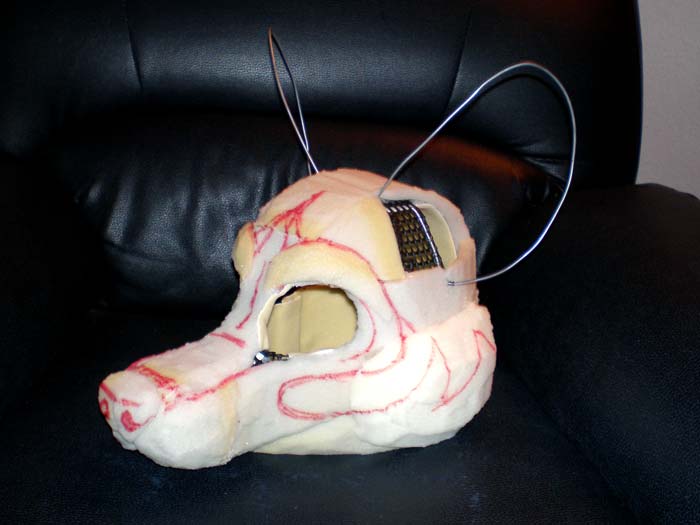
OMG ears! As wild dogs have quite big round ears, I added the basic form with a strong wire, which I attached to the black mesh by using a thin flexible wire.
我的天啊,耳朵!既然野狗有非常大的圓耳朵,我用粗鐵絲做了個骨架,並用細鐵絲將其連在網上。
This way I could easily bend and form the ear wire until I found the final position that I liked.
這樣我就能很容易地改變耳朵形狀直到滿意爲止。
Be careful that the sharp wire endings never point towards your head or face! Danger of injury.
小心,鐵絲末端鋒利,不要將其指向頭部或面部,否則有受傷危險!
--------------------------------------------------------------------------------
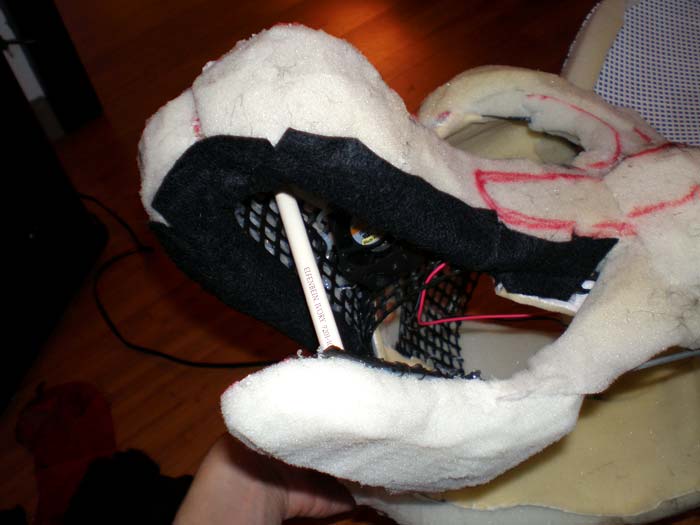
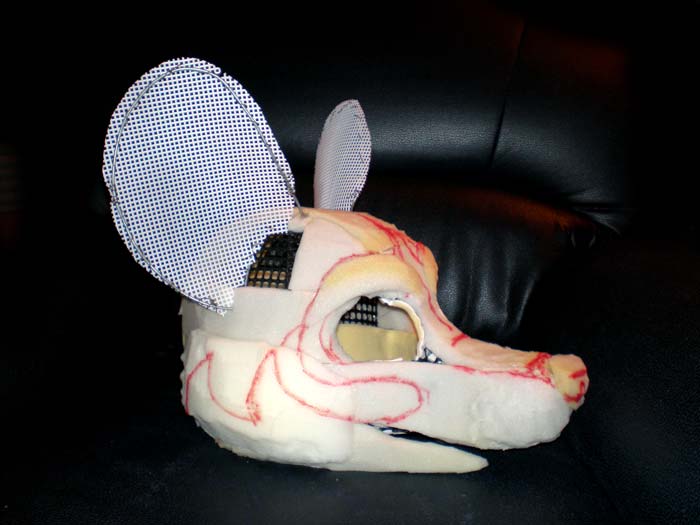
Now cutting out mesh and attaching it to the wire, again by using the thin flexible wire. I had to be careful that the (white) flexible mesh didn't break.
現在裁切好紗網並將其安放在鐵絲上面,同樣也是用細鐵絲。我需要小心以防(白色的)彈性網破損。
btw. the chin/jaw (on the photo) is not completed yet (it's just a little piece of foam). I still added more foam and the jaw wire (see next picture).
順便地,照片上的下巴還沒完成,它還是簡單的一塊泡棉。我還加了更多的泡棉和鐵絲(見下一張圖)。
--------------------------------------------------------------------------------
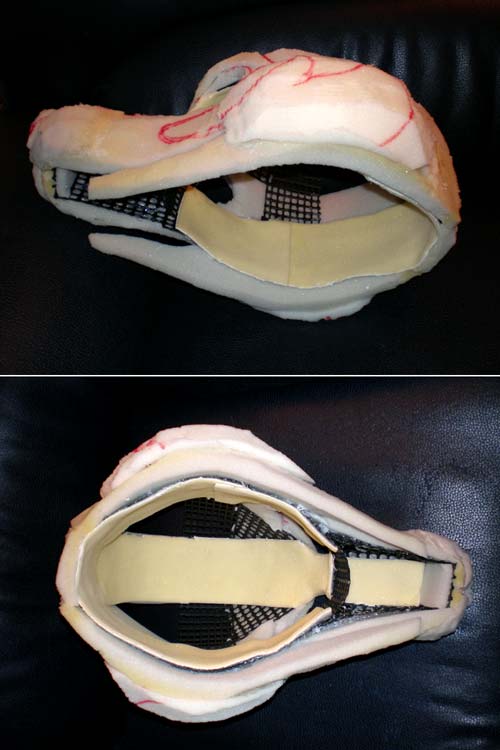
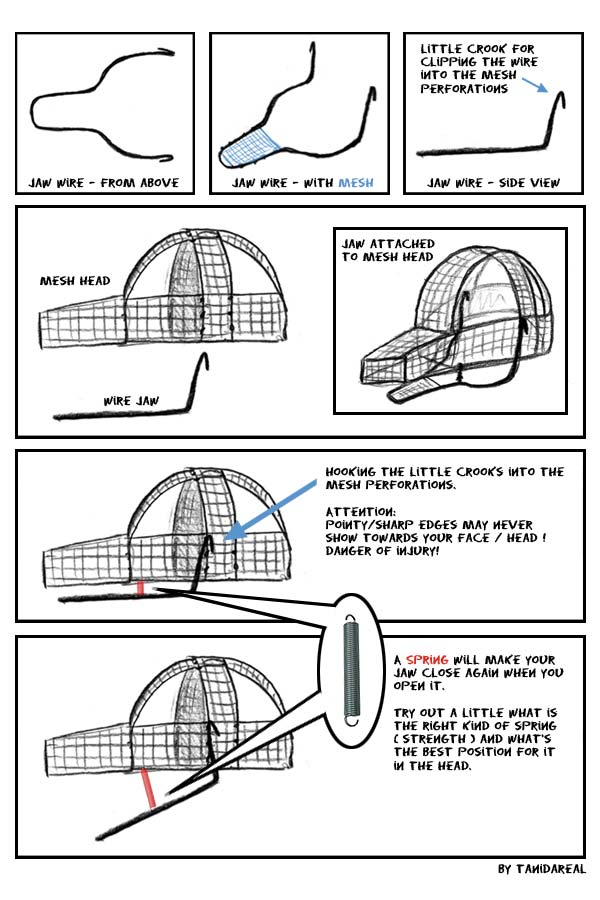
I used a wire and formed the jaw, see the picture. The endings I just attached to the holes in the black mesh (no glue, just hooking them in, hidden under the thin foam inlay).
如圖我用鐵絲固定下巴的形狀。末端只是連在了黑網的洞裏(沒用膠,只是拴在上面,藏在泡棉內部)。
I added a little mesh piece between the wire to make it more stable (and as basis for the teeth), then I added the chin foam to it (hot glue).
我在鐵絲之間加了一塊網來使它更牢固(也作爲牙齒的底座),然後粘上一塊薄泡棉(熱熔膠)。
--------------------------------------------------------------------------------
Next steps, m'kay?
繼續下面的步驟,OK?
We installed the 12V PC fan in the muzzle (easily attached with cable ties to the black mesh). The fan will blow the air out of the mouth.
我們在鼻子裏安裝12V的電腦風扇(容易用電線固定在黑色的網格上)。風扇會將內部的空氣吹出去。
Before furring, I covered the lips with black felt, to make sure no foam will shine through later.
在添加毛毛前,我在嘴唇部覆蓋了黑色的毛氈(咦?),以防泡棉被穿透。
--------------------------------------------------------------------------------
添加毛毛布
Now furring the head:
現在,在頭部添加毛毛布:
I used some thin (cheap) cloth for the pattern, because it's thin and flexible. I cut out the patterns (according to the patterns on the foam head), and when it was right - I transfered it to the final fur. Cut out the fur, attaching with hot glue.
我用一些便宜來制作圖案,因爲它薄而且制作靈活。我裁下這些圖案(根據泡棉頭上的圖案),當它準確無誤時,我將其轉變成最終的毛毛布。裁剪毛毛布,然後用熱熔膠粘上。
--------------------------------------------------------------------------------
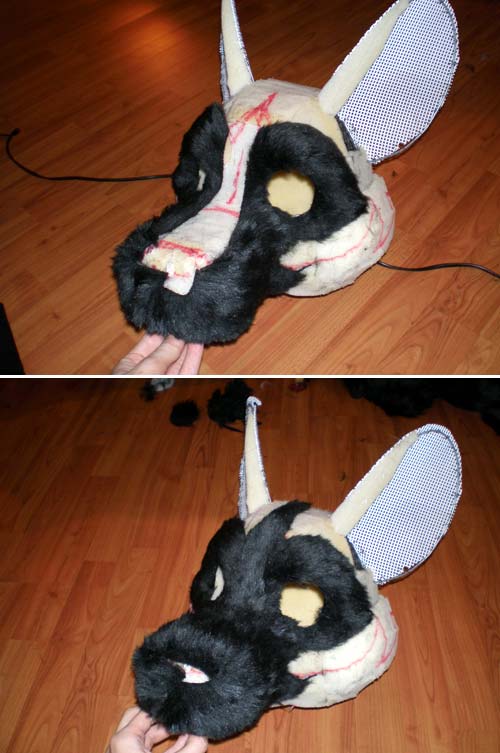
Fluffy ears! OK, now it still looks a little like Idefix the dog, with all the untrimmed, fuzzy face fur.
毛絨絨的耳朵!好吧,在未經整理的毛毛的陪襯下,現在它依然像狗狗Idefix。
The pink inside of the ears are simply felt (same as for the black lips). Inside, I still added a stripe of long, white fur, to make it look more natural.
耳朵的內部材料都是簡單的粉色毛氈(就像黑嘴唇的一樣)。裏面我依然加了一條白毛,使它看起來更有真實感。
--------------------------------------------------------------------------------
Adding the spotty wild dog colored fur was a little tricky to get the right parts together (dark to dark, light to light).
把不同顔色的斑點拼在一起有點麻煩(深色對深色,淺色對淺色)。
This time, I decided to attach the battery packs to the body (kidney belt) again, not to the head, because I wanted the head to be a little lighter than Savoy's.
這次我打算再次把電池放在腰帶上而不是頭部,因爲我想讓這個獸頭比Savoy的還要輕點。
--------------------------------------------------------------------------------
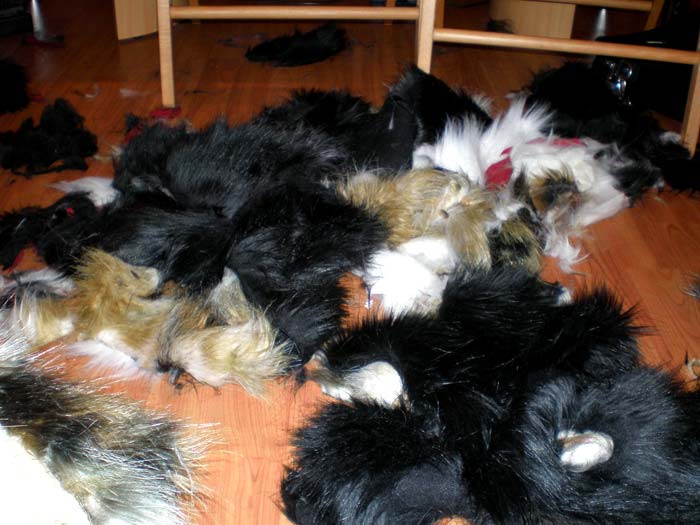
Oh... and by the way...
If you're still living at your parent's home and want to make a fursuit - here's the reason why you should maybe ask them first if it's OK, because it's always a damn MESS and you will still find pieces of fur in your underwear for weeks. =)
呃……順便說說……如果你還和父母住在一起而且想做獸裝的話,這就是爲什麽你需要征得父母同意的原因——這是因爲房間會非常亂而且數周以後你還會在你的衣物裏發現毛毛碎片!
--------------------------------------------------------------------------------
後期調整工作
The furring is completed so far. Now comes the trimming of the fur (using an electric shaver) to give it a nicer shape and not look like a Schnauzer (unless you want to make one).
毛毛的添加工作完成了,現在要用電動剃須刀修剪毛毛來使它有更好的形狀,避免它看起來像條雪納瑞犬(除非你真想做個這樣的)。
When the fur is finished, I add the teeth and eyes.
毛毛完成後,我添加牙齒和眼睛。
--------------------------------------------------------------------------------
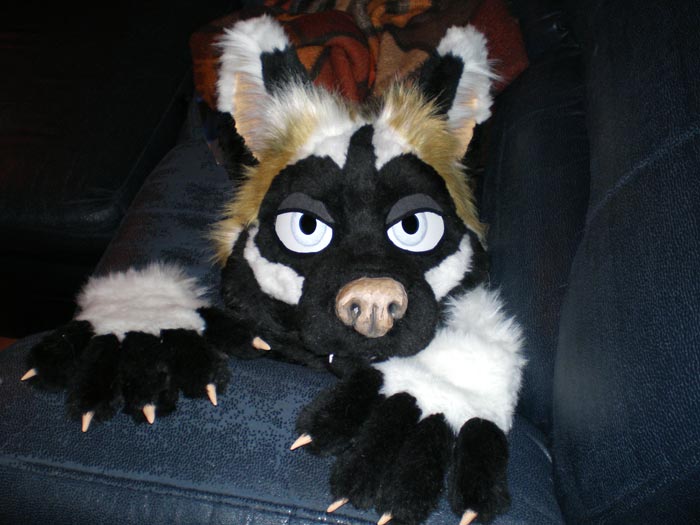
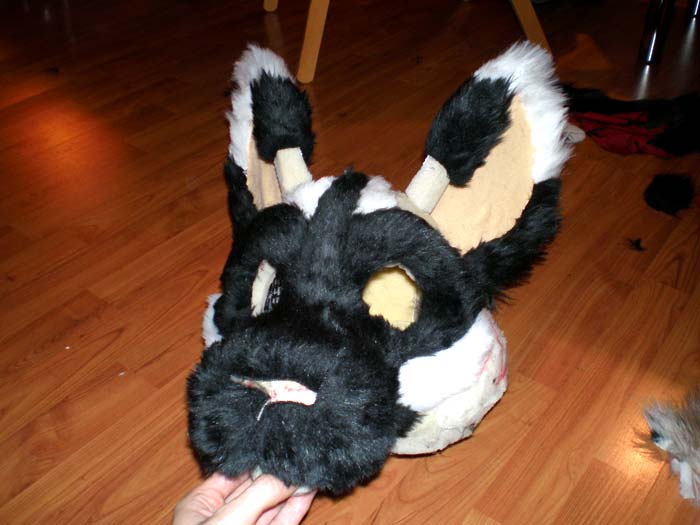
After trimming the face fur, the head looks like this. For trimming I used a simple electic razor (for long hair).
修建完的獸頭看起來這樣。修剪時我用的電動剃須刀。
Now I attached the nose, teeth, and adjusted the first test version of the eyes (see section Details for more infos about these parts).
現在我裝上了鼻子和牙齒,並且調整了第一個測試版眼睛(具體情況我再翻譯另一個網頁)。
--------------------------------------------------------------------------------
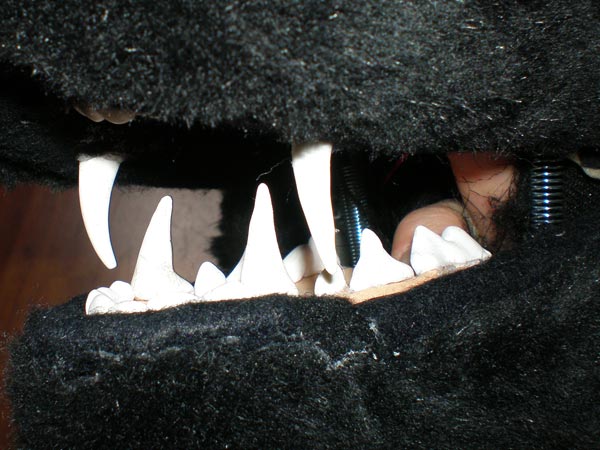
There are two springs in each side of the mouth that will make your jaw close. I have a belt of velcro underneath my chin to make the head fit tighter. I can open the velcro for putting the head on.
嘴巴的兩邊分別有兩根橡皮繩使嘴巴能夠關閉。我將一條尼龍搭扣裝在下巴下面使獸頭更加合身。我可以打開尼龍搭扣來帶上獸頭。
To avoid that your real face shines trough when you open the mouth - glue in a little piece of felt/foam rubber and/or wear a black balaclava.
爲避免張開嘴的時候真正的嘴巴暴露在外面,可以粘進一塊氈布、泡棉或者戴上一副黑balaclava頭巾。
--------------------------------------------------------------------------------
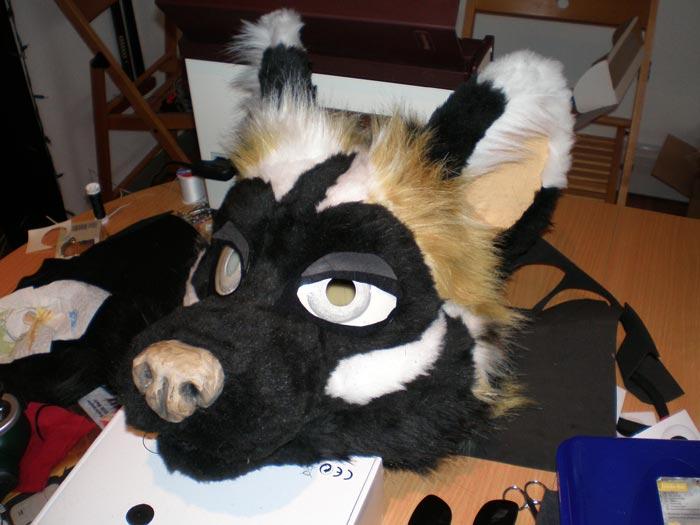
Adjusting the eyes, etc. usually takes quite a while until it looks good. Try to make the eyes as symmetric as possible, don't work sloppily here! The eyes will be the most important part if your suit looks nice or weird.
調整眼睛等工作需要較長時間。盡量把眼睛調整得對稱些,這裏不要太草率!眼睛是獸裝看起來漂亮或者古怪的重要因素!
Daiquiri's eyes are very bright, almost white, but she's a vampire, remember?
Daiquiri的眼睛非常明亮,幾乎是白色的,但她是吸血鬼,記住了嗎?
--------------------------------------------------------------------------------
Time taken for the head:
About 7-10 days of constant work by 1 person
頭部制作時間:一個人大約7到10天[img][/img]
图比较多,耐心点啦


 回覆時引用此篇文章


